
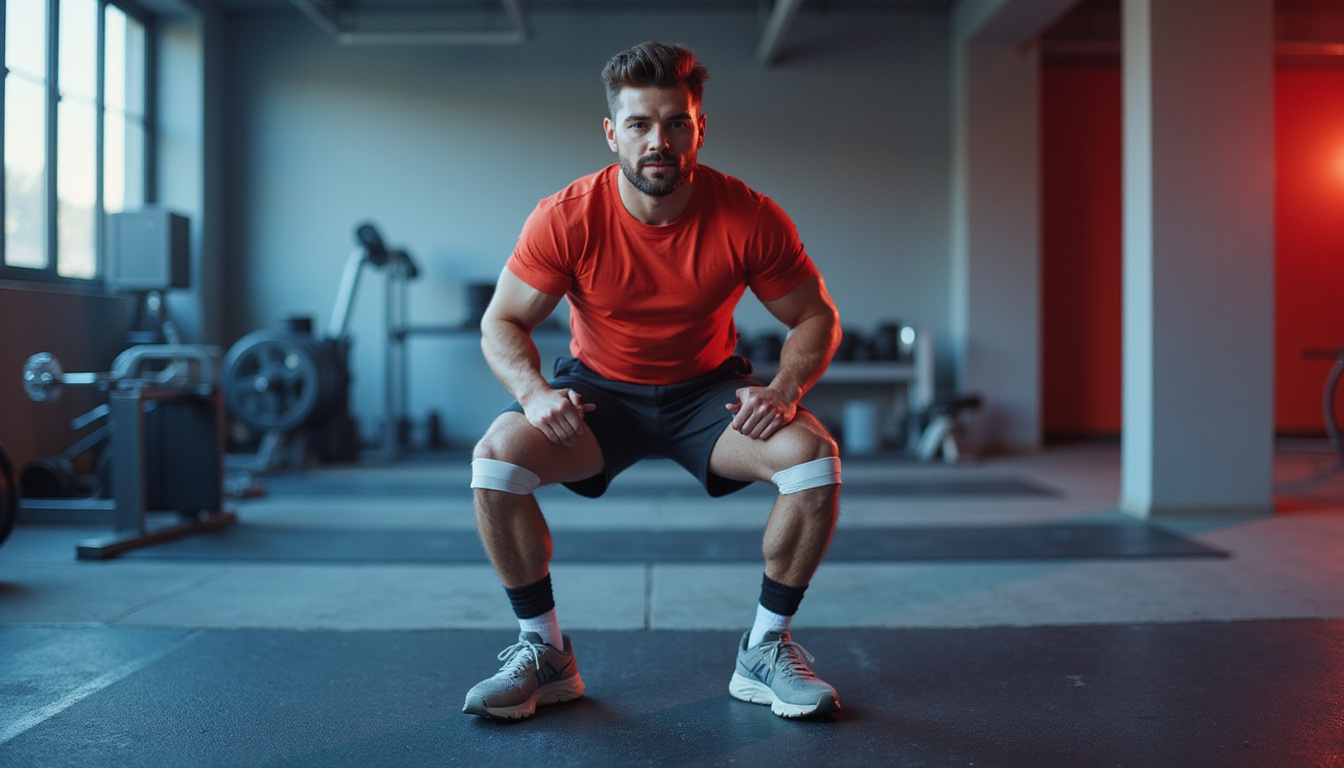
patellar taping techniques that quickly reduce knee pain and instability
by Zestora on Jan 02, 2026

If every step makes you wince, or your knee feels like it might “give way” when you walk downstairs, you’re not alone. Many people in America live with nagging knee discomfort, grinding under the kneecap, or that scary wobbliness when turning or squatting. One of the simplest hands‑on tools people use to get quick relief is patellar taping—carefully applied tape around the kneecap that can help improve tracking, comfort, and confidence in everyday movements.
Below is a practical, people-first guide to patellar taping: what it can and cannot do, step‑by‑step techniques you can try, and how to combine taping with nutrition-based joint support like Regenerix Gold for healthier, more reliable knees.
What patellar taping can realistically do for your knees
Patellar taping is a way of applying special tape across and around the kneecap (patella) to:
- Gently guide the kneecap into a more comfortable position
- Support the soft tissues that help center the patella in its groove
- Improve your “knee awareness” (proprioception) so the muscles fire more efficiently
- Reduce that “loose,” wobbly feeling during walking, standing from a chair, or going downstairs
People with long‑term knee issues often say things like, “It feels like my kneecap is sliding sideways,” or “My knee doesn’t feel secure on uneven ground.” Patellar taping is often used for that kind of discomfort and instability.
What it does not do:
- It doesn’t “fix” the joint or reverse structural changes.
- It doesn’t replace proper strengthening, stretching, and weight management.
- It’s not a substitute for professional medical care when needed.
Think of patellar taping as a short‑term helper—a way to reduce knee irritation and instability while you work on the deeper causes with exercise, lifestyle changes, and nutrition.
Getting started: what you need before you tape
Before you try any patellar taping technique, get these basics right:
1. Choose the right tape
For most people, two kinds of tape are used together:
- Rigid (non‑stretch) sports tape – usually 1–1.5 inches wide, for firm support and patellar positioning.
- Underwrap or hypoallergenic base tape – softer tape (or a thin foam layer) to protect your skin.
Some people also use kinesiology tape (stretchy tape) around the kneecap for comfort and support. It’s usually gentler on skin and easier to remove.
2. Prepare your skin
- Clean and dry the front of your knee (no lotions or oils).
- Trim hair if it’s very thick; this helps tape stick and makes removal less painful.
- If you have sensitive skin, use an underwrap or a skin‑friendly base layer.
3. Position yourself correctly
- Sit on a firm surface with your leg stretched out and a slight bend at the knee (about 20–30°).
- Rest your heel on a rolled towel or pillow so the knee is relaxed and not fully locked straight.
If you feel sharp pain, locking, or a “stuck” sensation when you bend or straighten your knee, speak with a healthcare professional before trying taping.
Classic medial glide patellar taping (for “sliding to the outside” feeling)
Many people feel like their kneecap is being pulled outward (toward the outside of the leg), especially when going downstairs or getting up from a chair. The medial glide technique is the most commonly taught patellar taping method to address that.
Step‑by‑step: medial glide taping
-
Apply base layer
- Put a strip of hypoallergenic tape across the front of the knee, just below the kneecap, as a skin protector.
-
Anchor on the outside
- Take a strip of rigid tape (about 4–6 inches).
- Anchor the first end on the outside (lateral) part of your knee, just next to the kneecap.
-
Glide the patella inward
- With your free hand, gently press the kneecap toward the inside (medial side) of the leg.
- At the same time, pull the tape across the front of the kneecap, maintaining that gentle inward glide.
-
Fix the tape on the inside
- Attach the other end of the tape to the inside of the knee, so it holds the kneecap slightly shifted medially.
- The tape should be snug but not cutting off circulation or causing pins and needles.
-
Test your knee
- Stand and walk a few steps.
- Try a gentle mini‑squat or step down from a low step.
- If the tape is helpful, you should feel less “grinding,” “catching,” or “wobble” in the kneecap.
You can add 1–2 more strips in a slightly overlapping way if you need more support, but more tape is not always better; comfort comes first.
Patellar tilt and “cupping” taping (for front‑of‑knee pressure)
Some people feel a lot of pressure or “fullness” right behind the kneecap when kneeling or going down stairs. They often describe it as “all the pain is in the front of the knee.” A subtle tilt correction can sometimes ease that pressure.
Step‑by‑step: tilt / cupping taping
-
Base tape first
- Apply a protective strip or underwrap just above and just below the kneecap.
-
Upper edge (tilt) strip
- Place one end of rigid tape on the upper outer corner of the kneecap.
- Use your fingers to lift the lower edge of the kneecap slightly away from the joint.
- Pull the tape down and inward so the upper edge of the patella is gently tilted toward the thigh.
- Anchor on the inside of the knee.
-
Lower “cupping” strip (optional)
- Place a new tape strip below the kneecap.
- Apply it in a curved “smile” shape that lifts the lower edge of the patella slightly upward into a more centered position.
Again, test your movements: walking, stair climbing, sitting to standing. If the tape feels restrictive or causes new discomfort, remove it.
Kinesiology patellar taping for all‑day comfort
If rigid tape feels too intense or irritates the skin, many people prefer a kinesiology patellar taping approach. This stretchy tape is often more comfortable for daily wear and activities like walking or light exercise.
Simple kneecap “U‑support” with kinesiology tape
-
Measure the tape
- Cut a strip long enough to form a U‑shape under your kneecap, from one side of the thigh muscle tendon to the other.
-
Anchor without stretch
- Bend the knee about 45°.
- Anchor one end of the tape on the inside of the thigh just above the kneecap, with no stretch.
-
Apply U‑shape under the patella
- Peel the backing to expose the middle of the tape.
- Apply it under the kneecap with some stretch (about 25–50%), guiding the patella gently upward and inward.
- Anchor the opposite end on the outer thigh above the kneecap with no stretch.
-
Rub to activate adhesive
- Warm the tape by rubbing along it gently; this helps it stick better.
This kind of patellar taping often feels like a soft “hug” around the kneecap instead of a rigid brace.
When to use patellar taping—and when not to
Patellar taping may be helpful if:
- Your knee feels unstable, especially on stairs or uneven ground.
- You feel a “pull” or ache around or behind the kneecap with squats or standing up.
- Your knee often feels sore after sitting for long periods.
- You’ve been advised by a doctor, physical therapist, or athletic trainer to try taping as part of your plan.
Avoid taping or stop immediately if:
- You have open wounds, rashes, or skin reactions in the taping area.
- The tape causes burning, intense itching, or numbness.
- The knee becomes more painful or feels locked or stuck.
- You have circulation issues or medical conditions where compression is unsafe—follow your clinician’s advice.
For persistent or worsening knee issues, a licensed health professional should evaluate you. Taping is a supportive technique, not a diagnosis or complete treatment on its own.
Combining patellar taping with strength, mobility, and nutrition
Taping is often most effective when paired with other strategies that support healthy knee joints and muscles over time.
1. Strengthen the key muscle groups
Ask a licensed provider or therapist about exercises that are gentle on stressed knees, such as:
- Straight‑leg raises
- Side‑lying leg lifts
- Wall sits (short holds)
- Mini‑squats within a pain‑free range
- Hip strengthening (glute bridges, clamshells)
These can help better align and control the kneecap, so you rely less on tape in the long run.
2. Maintain healthy flexibility
Tight quads, hamstrings, and calves can tug on the kneecap and change how it tracks. Regular stretching and light mobility work can ease tension around the knee.
3. Support knee tissues from the inside with Regenerix Gold
Many people who rely on patellar taping for comfort are also looking for a more foundational, nutrition‑based way to keep their knees moving smoothly. That’s where Regenerix Gold can fit into your routine.
- It is formulated as a supplement for healthy knee joints and muscles, not as a drug or treatment for diseases or diagnosed conditions.
- It’s a nutrition‑driven solution, designed to support the everyday demands you place on your knees—walking, climbing stairs, exercising, or working long shifts.
- It has been recommended by doctors and physical therapists as part of an overall strategy for people who want to stay active and protect their joint comfort.
- Regenerix Gold has been used internationally for over a decade, gathering positive feedback from users who want their knees to keep up with their lifestyle—whether that’s keeping up with grandkids or staying sharp on the job.
Always follow the usage directions on the label, and speak with your healthcare provider before starting any new supplement, especially if you are pregnant, nursing, taking medications, or have underlying health conditions.
For additional background on how nutrition and lifestyle influence joint comfort and mobility, see resources from the National Institutes of Health (NIH) (source: https://www.niams.nih.gov/health-topics/joint-health).
Practical tips: making patellar taping work in real life
To get the most from patellar taping while protecting your skin and comfort:
- Limit wear time at first – try a few hours to see how your skin responds.
- Remove slowly – peel tape back over itself and support the skin; consider using warm water or baby oil if it’s stubborn.
- Alternate taping days if your skin becomes irritated.
- Don’t tape too tight – if you can’t comfortably bend your knee or if your lower leg changes color or tingles, remove and re‑tape more gently.
- Pair with movement – use that window of relief from taping to do the strengthening and mobility work your knee needs.
FAQ: patellar taping and knee comfort
1. How does patellar taping help with kneecap discomfort?
Patellar taping can change the way forces travel through the kneecap and surrounding soft tissues. By gently shifting or supporting the patella, it may lessen stress in irritated areas and improve the way your muscles fire around the joint. Many people notice less “grinding,” burning, or achy pressure in the front of the knee during daily activities.
2. Is patellar taping for knee pain safe to use every day?
For most people with healthy skin, patellar taping for knee discomfort can be used frequently, but it’s wise to give your skin breaks and to monitor for redness or irritation. If you’re relying on tape all day, every day, it’s a sign you should also be focusing on strength, flexibility, weight management, and possibly nutrition support with a supplement like Regenerix Gold, under professional guidance.
3. Can patellar taping for instability replace a knee brace?
Patellar taping for instability can sometimes provide a more customized feel than an off‑the‑shelf brace, especially for kneecap tracking issues. However, it doesn’t fully replace bracing in all situations and isn’t suitable for all types of instability. Some people alternate between taping and a brace depending on the activity, based on advice from their healthcare provider.
Regenerix Gold
Take action: don’t let an “iffy” knee control your life
If your knee has you constantly calculating how far you can walk, which stairs you should avoid, or whether you can keep up with your workload, you’re already paying a mental and emotional price—possibly long before the medical bills start.
Using smart patellar taping techniques can give you quick, practical relief and more stability for daily life. Pair that with targeted strengthening and stretching, and you’re actively taking control of your knee comfort.
To go one step further, consider adding Regenerix Gold to your routine as a nutrition‑based way to support healthy knee joints and muscles. With more than a decade of international use, recommendations from doctors and physical therapists, and positive user experiences, it stands out as a choice for people who don’t just “hope” their knees will hold up—they plan for it.
If you value staying active, protecting yourself from the financial and career risks of being sidelined, and making smart, preventive choices, now is the time to act. Get a bottle of Regenerix Gold and experience its benefits for yourself—so your knees support the life you’re working hard to build, instead of quietly limiting it.
Health Note
Always consult a licensed medical doctor for your health issues.
Special Discount
If you prefer preventive nutrition to minimize expensive knee surgery and potentially addictive pharmaceuticals, Regenerix Gold is your savvy solution.
You qualify for a special discount.
Simply use the link below and a discount will automatically be applied during checkout.
Get Regenerix Gold => HERE


