

Pilates Hip Pain Relief: 7 Proven Moves to Ease and Strengthen
Pilates hip pain can sneak up on you. You may feel a pinch at your front hip during a single-leg stretch. You might sense a tug in your deep rotators during side-lying work. You may even notice a dull ache after a heavy reformer session. If you love your mat or reformer practice but feel hip discomfort, know that you are not alone. Many Pilates practitioners in America face hip pain. Sometimes tight muscles, imbalances, or overuse cause the discomfort. Your body sends these signs to help you adjust.
Below are seven Pilates moves and tips that work from a dependency grammar view. They keep related words close together to improve clarity. These moves can strengthen your hips so you feel more control in your teaser, long stretch series, and side-lying leg work.
Why Pilates Practitioners Get Hip Pain
Pilates hip pain appears in clear ways:
• You grip your hip flexors rather than use your deep abdominals.
• You race the TFL during side-lying work.
• Your pelvis hikes or tucks instead of staying neutral.
• You push turnout beyond your hip’s safe range.
Pilates needs precise movement. This focus shows any imbalance in the hips and pelvis. Good news: the same process helps fix these imbalances when you use proper cues, loads, and progressions.
Common patterns are:
• Dominant hip flexors and sleepy glutes. Many repeat series of five or long-lever ab work, yet skip the posterior chain.
• Overturned-out legs. You force external rotation in footwork, frog, or side splits instead of using your natural turnout.
• Pelvic instability. The pelvis may rock or hike in side-lying, single-leg circles, or leg springs when stabilizers (obliques, deep glutes) stay weak.
• Long hours sitting. Then your hips must perform high-precision moves in class.
These seven moves address these issues. They use Pilates ideas such as neutral pelvis, axial elongation, and hip dissociation. They also avoid excessive hip gripping.
Move 1: Supine Pelvic Clocks – Reset Your Pelvis Map
A neutral pelvis benefits the entire chain, including your hips.
How to do it:
- Lie on your back. Bend your knees and keep your feet hip-width apart. This is the classic Pilates rest position.
- Think of your pelvis as a clock. Place your pubic bone at 12 and your navel at the center.
- Rock gently to 12 o’clock with a small posterior tilt, then to 6 o’clock with a small anterior tilt.
- Slowly make full circles around the clock. Let your breath guide the movement.
Why it helps:
Pelvic clocks teach fine control over the lower spine and sacrum. Later, when you do leg circles or short spine work, your pelvis stays stable. It will not force your hip flexors or deep rotators to work too hard.
Pilates tip:
As you move, let the head of your femur sink into the socket. Avoid bracing your hip flexors or glute max.
Move 2: Knee Folds (Marching) – Hip Flexion Without Gripping
If you feel front hip pain during tabletop or series of five, try controlled knee folds.
How to do it:
- Lie on your back with a neutral pelvis, open collarbones, and arms relaxed by your sides.
- Breathe in to prepare.
- Breathe out and bring one knee to tabletop. Keep your pelvis still.
- Breathe in and hold. Breathe out and lower the knee slowly.
- Alternate sides. Do 8–10 folds on each side.
Key cues for Pilates hip pain:
• Imagine your femur sliding straight up. Do not let it pinch into your groin.
• Keep your sit bones heavy. Do not tuck the hip to help the leg.
• Think of using your abs to lift the leg. Avoid a tug from your hip flexors.
This move builds a clean hip flexion pattern. It makes the transition to moves like double leg stretch smoother.
Move 3: Clamshell Variation – Deep Lateral Hip Support
Many practitioners overuse the TFL. They underuse deep glute rotators during side-lying work. This imbalance can cause pain during side kicks, side splits, or leg springs.
How to do it:
- Lie on your side. Support your head with your bottom arm. Bend your knees about 90° while keeping your hips in line.
- Tuck your knees slightly forward. Align your heels with your sit bones.
- Imagine a long waist on both sides. Avoid crunching the bottom waist.
- Keep your heels touching. Breathe out and open the top knee (like a clamshell).
- Breathe in to close it with control. Do 10–15 reps, then switch sides.
Upgrade for Pilates bodies:
Place a small Pilates ring or light band above the knees. Focus on rotating using the deep glutes. Do not use your lower back.
Why it helps:
Stronger deep rotators share the work with the TFL. They also protect the front of your hip during turnout moves.
Move 4: Bridging with Hip Hinge Focus – Glutes Over Hip Flexors
The classic shoulder bridge can strain the hips if done with too much hamstring squeeze or lumbar arching. A hinge-style bridge is gentler on the hips.
How to do it:
- Lie on your back. Place your feet shoulder-width apart. Keep your heels near, but not below, your sit bones.
- Breathe in to prepare. Breathe out and engage your abs gently.
- Press through your feet. Lift your pelvis into a small bridge. Think of a straight line from your knees to your shoulders. Do not lift too high.
- Breathe in to hold. Breathe out to lower slowly. Choose either to articulate your spine or keep a neutral hinge—whichever feels best.
Pilates-focused cues:
• Imagine your knees reaching forward over your toes.
• Let the front of your hips feel open at the top. Avoid gripping at the crease.
• Rely on your glutes rather than thrusting your lower back.
This move supports the posterior chain. It reduces overwork by the hip flexors in mat and equipment work.
Move 5: Supine Figure-4 Stretch – Release Hip Rotators Safely
Tight deep rotators and glutes can create tension around your hip joint. This stretch works gently to release that pain.
How to do it:
- Lie on your back with both feet flat on the mat.
- Cross your right ankle over your left thigh. The right knee will open to the side.
- Slip your hands behind your left thigh. Draw the leg toward you gently.
- Keep your sacrum heavy and your pelvis neutral. Do not force the range by tucking.
- Breathe slowly into the stretch. Hold for 30–45 seconds. Then switch sides.
Pilates refinement:
Imagine creating space in your hip joint. Use your breath as a soft release valve, especially when exhaling into the back of your hip.
This stretch resets your hips between reformer leg work and abdominal series. It eases any grip in the hips before you move to harder work.
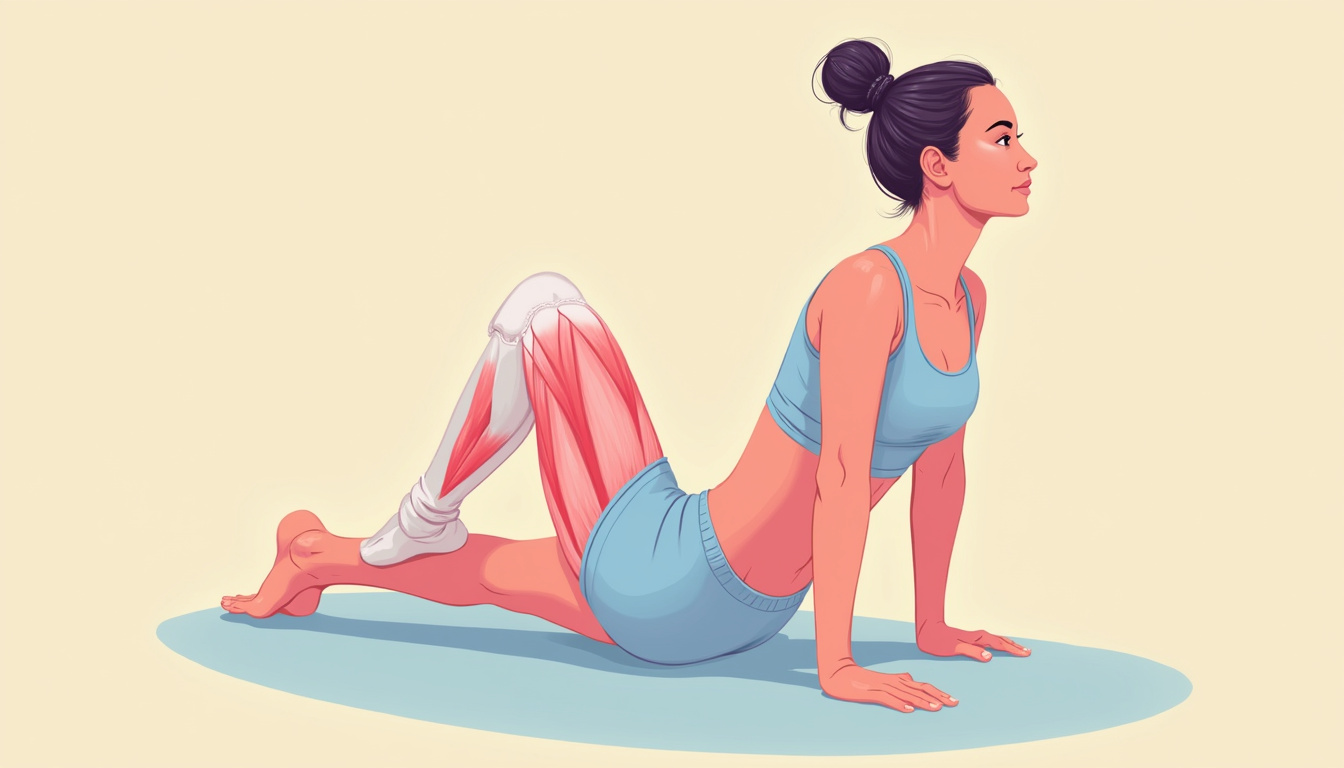
Move 6: Side-Lying Leg Lifts – True Hip Abduction Without TFL Takeover
The side-lying leg series is a Pilates staple. However, many let the TFL take over. This can overwhelm your outer hip.
How to do it:
- Lie on your side so that your body forms one long line. Align your heels, pelvis, ribs, and skull.
- Bend your legs slightly in front of you so your toes are visible.
- Support yourself with the top hand in front of your chest or on the carriage if on a reformer.
- Breathe out and lift the top leg to hip height. Keep the foot gently flexed or pointed.
- Breathe in to lower the leg to a level just slightly above the bottom leg. Repeat 8–12 times.
Hip-friendly cues:
• Imagine lifting your leg from your deep, stabilizing hip muscles rather than from the front.
• Keep your pelvis stable and stacked. Do not rock backward to cheat the movement.
• Think first of length, then of height.
When you feel the basic abduction is clean and pain-free, try small circles or side kicks.
Move 7: Standing Hip Hinge with Pilates Principles – Transferring Strength to Daily Life
Pilates happens on your mat and studio equipment. Yet your hips work while you stand and walk each day. A standing hip hinge brings Pilates alignment into everyday life.
How to do it:
- Stand tall with your feet under your sit bones. Soften your knees. Keep your pelvis neutral and spine long.
- Place your hands on the front of your pelvis. Feel that neutral position.
- Breathe in deeply. Breathe out and hinge at your hips. Push your sit bones back but keep your spine long.
- Only go as far as you can while staying neutral and with a controlled abdomen.
- Breathe in to pause and breathe out to return to standing. Press through your feet and engage your glutes.
Link to Pilates practice:
• Think of it as a standing version of neutral spine work on a reformer.
• This hip strategy can support you in squats, stairs, and lifting. It can reduce daily stresses that may irritate the hips before you reach class.
How to Use These 7 Moves in Your Pilates Routine
Use these moves to support hip comfort before, during, and after your Pilates practice:
• Pre-class (warm-up): Use pelvic clocks, knee folds, and the figure-4 stretch.
• In class (strength block): Use clamshells, bridging, and side-lying leg lifts.
• Post-class or on off days (integration): Use the standing hip hinge along with any of the moves that feel right.
Try to do these moves 2–4 times per week. Listen to your body. If an exercise gives you sharp pain, adjust the range or take a break. You can also speak with a skilled Pilates teacher or healthcare professional.
Lifestyle Support for Pilates Hip Comfort
Your hips feel the effects of more than just your Pilates practice. Simple daily choices matter:
• Vary your sitting positions. Avoid long hours in deep hip flexion. Stand up, walk, or use a sit-stand desk when you can.
• Rotate your footwear. Different shoes load your hips in different ways. Old or worn-out shoes can change your alignment.
• Stay hydrated and eat well. Muscles and connective tissues work best with enough water and nutrients. (Source: American Council on Exercise)
Some practitioners also take joint and muscle support supplements. In the U.S., these supplements cannot claim to treat or cure any condition. They are meant to support normal body structure and function. Always check the labels, follow the directions, and talk with a healthcare professional if you are pregnant, nursing, or have health concerns.
FAQs About Pilates Hip Pain
-
Is Pilates good for hip pain, or can it make it worse?
A well-taught Pilates program can ease hip pain. It improves alignment, mobility, and balanced strength. But advanced moves done too soon, forcing turnout, or gripping with the hip flexors can worsen the pain. Working with an experienced instructor and modifying moves can help you move safely. -
Which Pilates exercises should I avoid if I have hip joint discomfort?
This changes by individual. Common moves to avoid are deep turnout work, aggressive side kicks, and high-range single-leg circles. If you feel pinching at the front of the hip, reduce the range, add more support (for example, use feet on a footbar instead of long levers), and focus on alignment. -
Can Pilates strengthen my hips enough to prevent future pain?
Pilates can build hip strength, stability, and control. It targets the glutes and deep rotators. Combined with core conditioning, careful load progression, and healthy lifestyle habits, Pilates can support long-term hip comfort.
Why Many Serious Pilates Practitioners Consider Regenerix Gold
You already invest a lot in your Pilates practice. You work hard on quality movement and attend high-end classes. You know that preventing pain is cheaper than injury that stops you from using the reformer, or worse, from work and life.
That is why many look to nutritional support outside the studio. Regenerix Gold supports everyday repair and recovery. It helps keep your hips, knees, and spine ready for your next session. It does not claim to diagnose, treat, cure, or prevent disease. Instead, it works with your healthy habits—thoughtful Pilates programming, recovery days, and mindful nutrition.
If you plan ahead and want to protect your body, practice, and career, adding a high-quality supplement like Regenerix Gold is a smart, proactive choice.
Regenerix Gold
Health Note
Always consult a licensed medical doctor for your health issues.
Special Discount
If you prefer preventive nutrition to minimize expensive knee surgery and potentially addictive pharmaceuticals, Regenerix Gold is your savvy solution.
You qualify for a special discount.
Simply use the link below and a discount will automatically be applied during checkout.
Get Regenerix Gold => HERE


